
Martin's
GNU/Linux Projects
NAS - using a thin client and a USB hard drive
Last modifications: 13 October 2024
- What is NAS?
- Why making my own NAS?
- The hardware
- Preparations for installation
- Installing GNU/Linux
- Mounting the external hard drive
- Get access to your NAS
And you can do more with your NAS...
What is NAS?
Network attached storage (NAS) is data storage connected to a network, providing data access to all the computers in this network. A NAS device actually is a computer as well but without monitor, keyboard and mouse. It operates as a file server and normally runs 24/7. The image below shows how a NAS device and multiple computers are connected to a home network (LAN).

With NAS there is no need to have copies of the same files on different computers. At home for example, everybody can view the same holiday pictures stored on the NAS device, using their own computer. Most NAS devices can do more, for example function as a music player or a print server. With a print server, every computer at home can print to the printer connected to the NAS device.
Why making my own NAS?
Many NAS home consumer devices run a customised version of GNU/Linux. That may sound great if you are a GNU/Linux fan (like me) but...
- Controlling the device is often limited to some configurable preferences.
- Usually it is not possible to run programs other than the preinstalled ones.
- Connecting to a NAS device using SSH or Telnet is not always possible.
- If it is, chances are you can not use all the shell commands you are used to.

It made me think: why not install the GNU/Linux flavour I want, install the software I want and configure the NAS device the way I want?
Unfortunately most NAS devices do not allow the installation of other operating systems or can not run a "standard" GNU/Linux distribution.
So I decided to make my own NAS. Just to be in control. Just for fun. And during this project I learned a lot about GNU/Linux as well.
The hardware
To make your own NAS, you need a computer with a network adapter and enough disk space for all your data. Of course you also need an operating system and programs to run on it. But first let's focus on the hardware.
Why using a thin client?
You could use a normal PC as a NAS. But the energy consumption of a PC is quite high and I find that undesirable for a device that is running day and night. Two other things I do not like about the PC option are noise and size.
Computers that do not have these disadvantages are thin clients. They are small, do not make any noise (no fans) and energy consumption is low. Yet they can be very powerful.

There is one problem: thin clients have very limited storage capacity. But that can be solved easily by connecting a USB hard drive.
The hardware I use
So I needed a thin client and a USB hard drive. I found the following hardware for my NAS device:
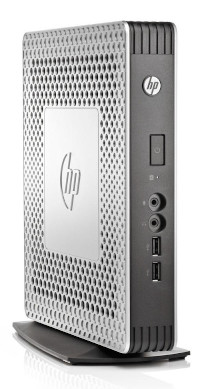
- Thin client: HP t610 (second hand)
- USB hard drive: Samsung T5 SSD (500 GB)
Here some specifications of the HP t610:
- AMD Dual-Core 1.65 GHz processor
- 1.4 GB RAM
- 13 GB flash memory (a kind of hard drive)
- 4x USB 2.0 and 2x USB 3.0 ports
- Ethernet 10/100/1000 Mb/s (RJ-45)
These specifications are more than sufficient for the things I want to do with my NAS.
The hard drive I chose is a Solid State Drive, the Samsung T5. This SSD gets its power via USB, so no external power supply is needed. It is energy efficient and fast (USB 3.1). Nowadays many affordable USB hard drives are available.
Why not using a Raspberry Pi?
The first Raspberry Pis were sold in 2012. And I started my project in 2011. But indeed, you could use a Raspberry Pi to make a NAS device.
Preparations for installation
Before you can install GNU/Linux on your thin client, you have to do some preparations first.
Hooking up the thin client
Connect a monitor and keyboard to your thin client. Monitor and keyboard will only be used during installation. Furthermore you need to connect your thin client to the internet and of course to a power supply...
Downloading GNU/Linux
Iso images of GNU/Linux installers can be found online. I chose to use the Debian network installation.
Making a bootable USB stick
The most convenient way to install GNU/Linux is from a USB stick (if you want to install from disc, you need to connect an external CD/DVD player to your thin client). To make a bootable USB stick, you can not just copy an iso image to it. You need a special tool to do it.
How to put an iso image on a USB stick (GUI)
If you use GNU/Linux you may already have a tool that can write an iso image to a USB stick. For example:
- Startup Disk Creator (Ubuntu)
- USB Image Writer (Linux Mint)
Or you can use UNetbootin or Etcher (both run on Windows, macOS en GNU/Linux).
How to put an iso image on a USB stick (command line)
- Open a terminal and log in as root
- Copy the iso image to the USB stick by typing:
# cat debian.iso > /dev/sdX
# sync
Replace debian.iso with the real name of the iso image. And replace X with the letter corresponding with the USB stick (type df in a terminal to find out).
Note: be sure to use the right drive letter X, otherwise you may lose data or lose your complete operating system!
Booting from USB stick
In order to run the installer, the thin client has to boot from the USB stick. You can set this in the boot menu. If a boot menu is not available, you have to change the boot order in the BIOS.
Installing GNU/Linux
I installed Debian GNU/Linux on the internal "flash drive" of the thin client. On a NAS device you do not need a graphical desktop environment, so I only installed the standard system utilities. In my setup, the complete system (OS and applications) takes up about 5 GB of space.
If the flash memory of your thin client is not big enough, you can install the operating system on the external USB hard drive. Or you can install it on a second USB hard drive or USB stick (if you prefer to have a separate system disk).
Mounting the external hard drive
In a desktop environment you can easily mount and access an external hard drive with a mouse click. On a server it is convenient to mount the external hard drive automatically.
Note: If you installed GNU/Linux on the external hard drive, the drive will already be mounted automatically. So in this case you can skip the how-to below.
How to auto mount an external hard drive
First find out the UUID of the partition (or partitions) on your external hard drive. You need this UUID to mount the hard drive via fstab.
Open a terminal, log in as root and type:
# blkid
This command will show the UUIDs of all the partitions on all the hard drives. Identify the UUID of the partition you need to mount and add the following line to the file /etc/fstab:
UUID=uuid-of-partition /mount/directory ext4 noauto,x-systemd.automount 0 2
The option x-systemd.automount ensures that the hard disk will be automatically mounted when it is accessed. You could use the option auto (instead of noauto,x-systemd.automount), but then your NAS may not boot when mounting goes wrong, for example if the hard drive is not connected.
After saving the file fstab, reboot your NAS.
Get access to your NAS
Now that your NAS is up and running, it is time to enable remote access.
Access with SSH
The first thing to install is the OpenSSH server. After installation, check if you can log on to your NAS from a remote terminal using SSH. If this works fine, you can remove the monitor and the keyboard. From now on, you will have to control your headless NAS via a terminal on another computer.
Access with a file manager
To access your NAS using a file manager on a remote GNU/Linux computer, install the OpenSSH SFTP server. If you want to access your NAS from a Windows computer using the Windows file manager, install Samba.
At this point you have created a NAS device with its main function: network attached storage. But you can do much more with your NAS. So read on!
Multi-room audio player
My complete music collection is stored on my NAS. The music can be streamed to other computers, all playing in sync. A multi-room audio system makes this possible.
Read more about my other project: Multi-room audio player.
Network printing
My printer is connected to my NAS, so I can print from any computer in my home network. To install and manage printers I use the CUPS web interface. By default you can use this web interface only on the computer where CUPS is installed (via: http://localhost:631). But it is possible to enable remote access to CUPS.
How to enable remote printer administration
On your NAS edit the CUPS configuration file: change the red line, add the blue lines. In Debian the location and name of this file is /etc/cups/cupsd.conf.
   ...

   # Only listen for connections from the local machine.
   Port 631 # was: Listen localhost:631
   Listen /var/run/cups/cups.sock

   ...

   # Web interface setting...
   WebInterface Yes

   # Restrict access to the server...
   <Location />
     Order allow,deny
     Allow all
   </Location>

   # Restrict access to the admin pages...
   <Location /admin>
     Order allow,deny
     Allow all
   </Location>

  # Restrict access to configuration files...
   <Location /admin/conf>
     AuthType Default
     Require user @SYSTEM
     Order allow,deny
     Allow all
   </Location>

   ...
After restarting CUPS (on Debian: /etc/init.d/cups restart) you can open the web interface from any computer. Open a web browser and go to: http://server:631 (replace server with the name of your NAS).
Downloading torrents
Transmission is a nice torrent client for downloading and sharing large files, like software, movies and music. But it took me some time to find out which parts to use on my NAS device.
How to use Transmission on a server
On your NAS you need transmission-daemon and possibly transmission-remote. In Debian Wheezy the packages to install are transmission-daemon and transmission-cli (which contains transmission-remote).
- transmission-daemon
BitTorrent client designed for headless servers. - transmission-remote
Command line tool for controlling the daemon (handy for scripting and scheduling).
To control the daemon from another computer you can use the web interface. Open a web browser and go to: http://server:9091 (replace server with the name of your NAS). Via the web interface you can for example add torrents and monitor your downloads.
When Transmission is up/downloading, this will slow down other internet traffic. Therefore on my NAS device Transmission is only active at night. I use transmission-remote and cron to schedule this.
World wide access (in the cloud!)
It can be very practical to have world wide access to your data. So put your NAS in the cloud! Here three ideas using the Apache web server.
World wide access (read only)
Normally Apache is used to serve web pages over the Internet. I use Apache to serve the data on my NAS, so I can easily access my data world wide using a web browser (see the image below).

How to serve your data world wide using Apache
Security first!
Before you decide to serve your data world wide, think about security. Normally you do not want others to have access to your data. So I configured Apache to use authentication and SSL. There are many websites that explain how you can do this.
After configuring Apache with the desired security (the hardest part) the rest is relatively simple:
- Make a symbolic link to your data in the Apache document root directory (in Debian the default is: /var/www/).
Open a terminal, log in as root and type:# cd /var/www/ # ln -s /your/data/directory/ data
- Make sure the Apache option FollowSymLinks is enabled (see the Apache virtual host configuration file).
- To allow access over the Internet, forward port 443 to your NAS (or port 80 if you do not use SSL). This can be set in your router.
To access your data start a web browser and go to: http(s)://router-ip-address/data. The router IP address is assigned by your Internet Service Provider. If your ISP provides a host name, you can use that instead (see the image above).
World wide access with WebDAV (read and write)
Write access to my NAS from the Internet is restricted to a specific directory. This directory is accessible using the WebDAV protocol (supported by Apache and other web servers).
A WebDAV client is needed to access the directory share. You may use a special WebDAV client application or a file manager with built in support for WebDAV.
Share data with others

A public accessible directory in your web server setup can serve as a place to share large files with others. Just like with WeTransfer, you only send a link to the recipient, not the data itself. I call it MeTransfer. Very handy!
Conclusion
When I started my NAS project I had no idea what the result would be...
Version 1.0
In December 2011 I started with my NAS project, using a single core thin client and an external "old fashion" hard drive. Although this set up only had USB 2.0 and a 100 Mb/s network connection, it worked very well.

Speed was not sublime, but is was enough. For example, watching video from my first NAS worked smoothly, without hick-ups. It has been running day and night for about 8 years without any problem.
Current version
In January 2020 I decided to speed up things, implementing the set up as described on this page. With a dual core processor, an SSD via USB 3.0 and a 1 Gb/s network connection, this new set up is really fast and ready for the future!